Installation Instructions for the Can-am
Follow these simple steps, and you'll have the Quad-Rite Flip Guard attached ready for the "Ride Of Your Life".
Click on pictures for larger view.
Step 1:
Remove the plastic guard from around the factory trailer hitch on the back end of the Can-am by removing the 4 bolts.
Step 2:
Next, remove the trailer hitch by removing the 2 long bolts/nuts and the 2 short bolts/nuts holding the factory trailer hitch onto the back end of the Can-am.
Step 3:
The trailer hitch has now been removed from the Can-am and is now ready to attach the Quad-Rite mounted Assembly.
Step 4:
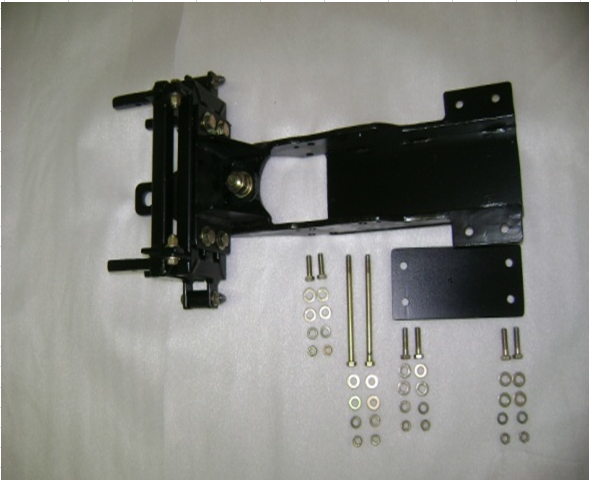
Remove the permanently mounted Assembly (Hereafter called the Assembly) from the package c/w 2-3/8" x 6" bolts, 4 washers, 2 lock washers and 2 nuts. You will also require 2- 3/8" x 1 1/4"" bolts c/w 4 washers, 2 lock washers and 2 nuts. Remove the plate with 4 holes from the package c/w 4-3/8" x 1 1/4" bolts with 8 washers, 4 lock washers and 4 nuts. You are now ready to install the Assembly onto the Can-am A.T.V.
Step 5:
The Assembly is positioned in the same location as the factory trailer hitch. 2-3/8" x 6" bolts c/w washers, lock washers and nuts and
2- 3/8" x 1 1/4"" bolts, c/w washers and nuts will secure the Assembly onto the back end of the Can-am A.T.V.
A second person is preferred when installing the Assembly onto the back of the Can-am. One person holds the Assembly under the Can-am in the same location as a factory trailer hitch. One 6" bolt is slid through one side of the Assembly, then through the body of the Can-am and finally through the second side of the Assembly. The nut is then finger tightened. (There are 2 washers provided with each bolt. One washer on the bolt side and the other on the nut side with lock washer.)
This procedure is repeated for the next 3/8" x 6" bolt and the 2- 3/8" x 1 1/4""bolts. Next, the plate with 4 holes is placed over the undercarriage of the Can-am A.T.V. and aligned with the 4 holes in the Assembly. The four bolts, 8 washers and 4 lock washers and 4 nuts are finger tightened. Next all the bolts holding the Assembly onto the A.T.V. are tightened.
Step 6
The plastic guard can be bolted onto the Assembly. (Optional) The 4 original bolts holding the plastic guard onto the factory trailer hitch can be used to bolt the plastic guard onto the Assembly. Assembly is now permanently attached onto the Can-am A.T.V. The bolts should be checked periodiocally to ensure they are tight.
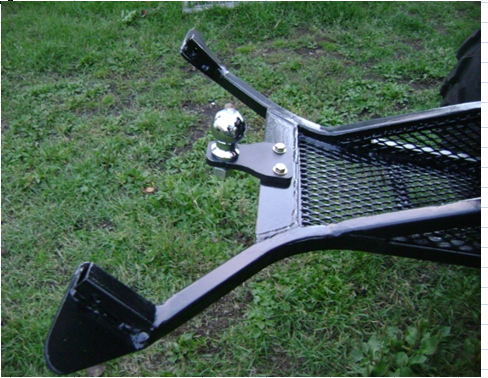
Step 7
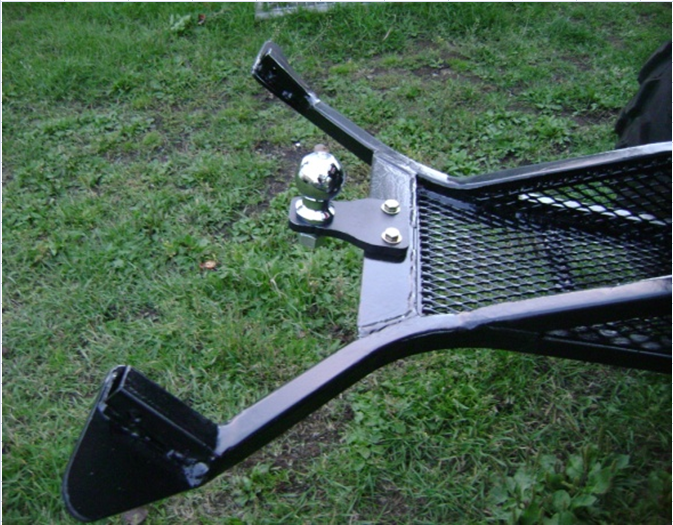
A trailer hitch ball can be attached onto the hitch plate of the Assembly. Follow the warnings on the labels and also the installation instructions.
Step 8
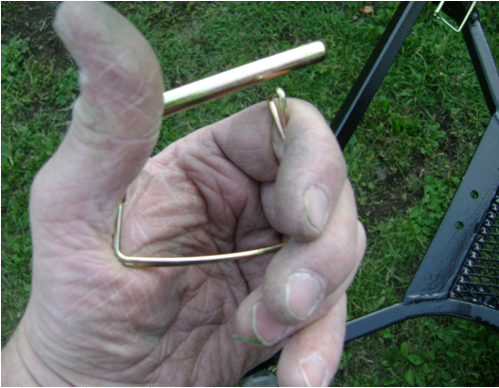
The Quad-Rite Flip Guard with either the Carrier Model or the Sport Model can be attached to the Assembly on the Can-am A.T.V. by removing the 4 quick pins, then sliding the Flip Guard onto the four square bars of the Assembly and then reinserting the 4 quick pins and then locking into the closed position. Ensure that the locking arm of the quick pins do not hang down where the terrain could dislodge them out of the holes in the Flip Guard. Insert pins as in picture. (Locking arms are kept to the inside of the Flip Guard.)
Step 9
Follow these simple steps, and you'll have the Quad-Rite Flip Guard attached ready "For The Ride Of Your Life".
Maintenance
Over time the quick pins can loosen off and not provide the function of a locking mechanism. The quick pins can be retightened by periodically squeezing the locking arms tightly together.
"Warning"
As mentioned in the Warnings, The Quad-Rite Flip Guard is positioned at a pre-determined angle and is not adjustable. This is set for your safety.
" Do Not Make Any Adjustments ".
"Loading Bar Option"
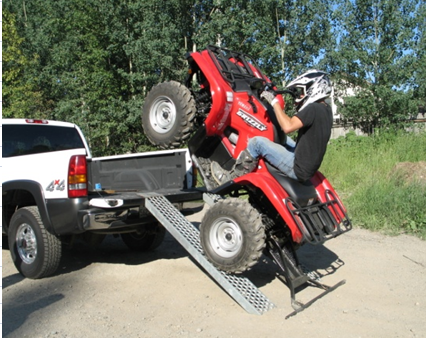
The Loading Bar is inserted into the back of the Flip Guard. Quick pins hold the Loading Bar in place. The bar is wider than the A.T.V. which will give protection when climbing up the narrow ramps. Read the warning labels on the outside of the tips of the Loading Bar before use.
"Detachable Hitch Plate Option"
The Detachable Hitch Plate can be attached and removed when required. Follow the warning label on the trailer hitch plate.
Installation Instructions for the 550, 660 & 700 Grizzly Model
Click on pictures for larger view.
Step 1:
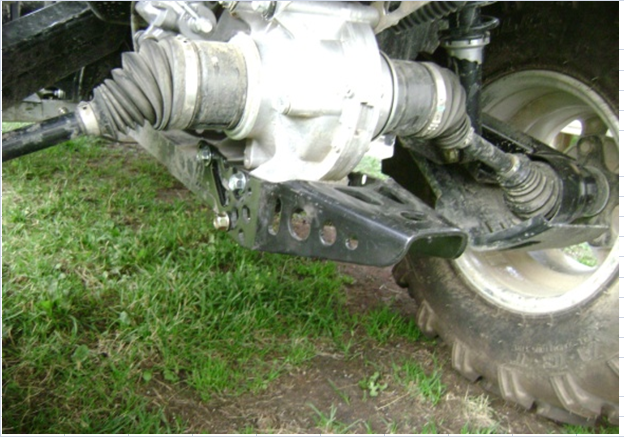
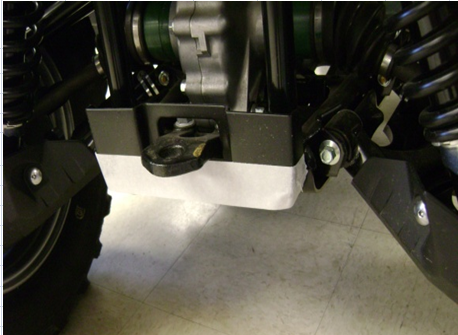
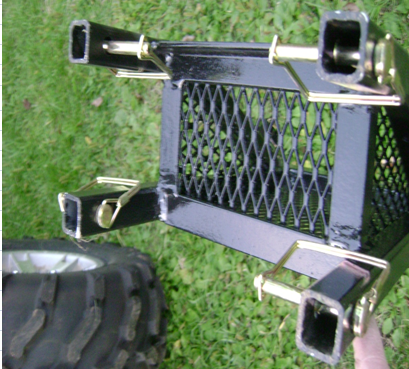
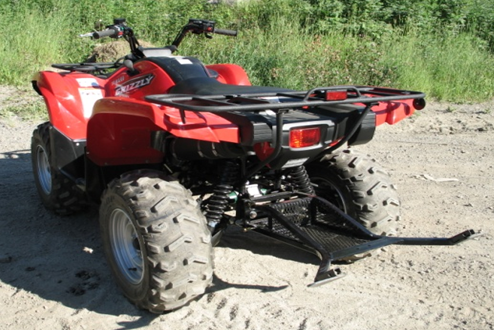
A back view of the Grizzly model. The Quad-Rite Flip Guard will attach onto the back end of Grizzly Models. The 660 Grizzly Quad-Rite Assembly is slightly different than the 550/700 Assembly but both attach onto the back end of the Grizzly the same way: Connects onto the 2 back vertical pipes and also the 2 holes of the factory hitch plate location.
Step 2:
Wrap a piece of tape on the 3 sides of the plastic guard just below the factory hitch plate. Remove the 2 bolts holding the factory hitch plate onto the back end of the Grizzly model. Next, take-off the plastic guard. Cut the plastic guard above the tape line. Once the plastic guard is cut down, reinstall it onto the Grizzly Model.
Step 3:
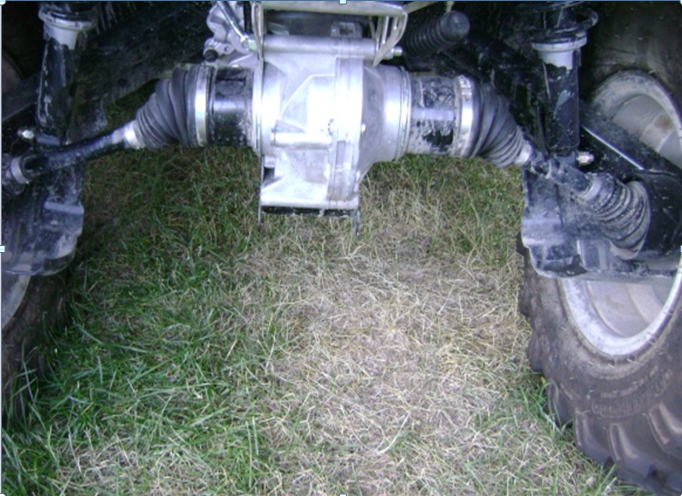
In this photograph, the Plastic guard has been removed for clarity only. Before installing the U-plates, the plastic guard is replaced onto the back of the Grizzly. Slide the U-plates over the vertical back pipes on the Grizzly model.
Step 4:
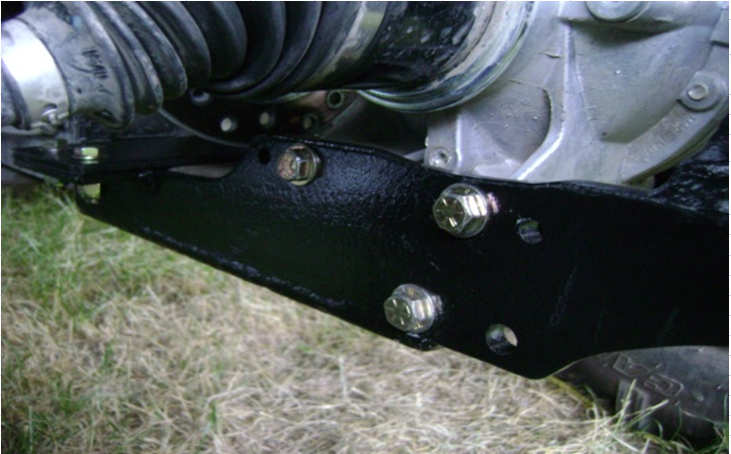
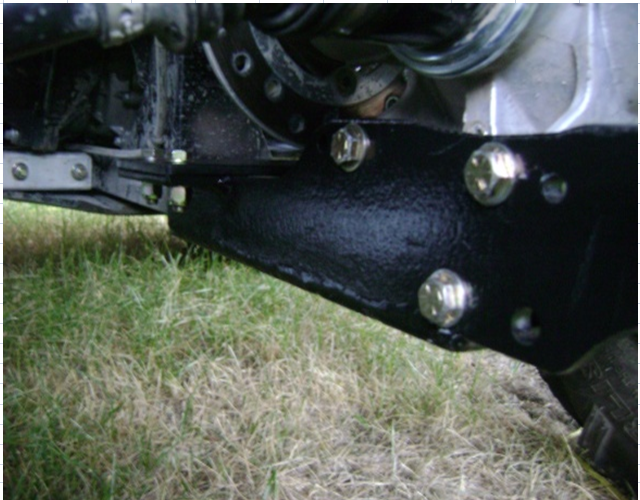
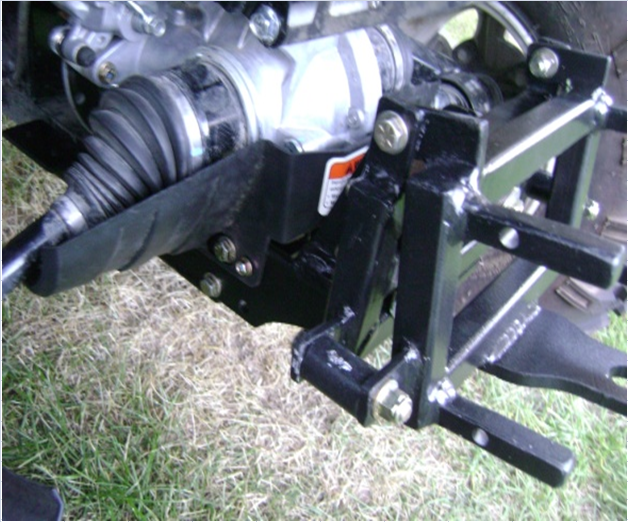
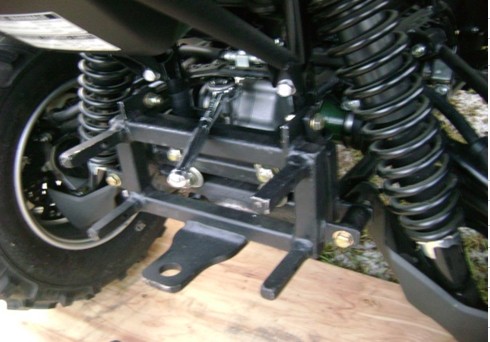
The Quad-Rite Mounted Assembly (Hereafter to referred to by the Assembly) will now be put in place so that the front plate with (2 holes aligns) into the location of the factory hitch plate holes. Finger tighten these existing factory bolts. The 4-1/2" X 3 1/2" bolts c/w 8 washers and 4 lock washers and 4-1/2" nuts are slid through the one side of the U-plates, then through the spacer (4 of) then through the other side of the U-plate and finally through the space in the Assembly. (One washer is placed on the bolt head side and one washer and lock washer is put on the nut side.) Finger tighten these 4 bolts/nuts.
Step 5:
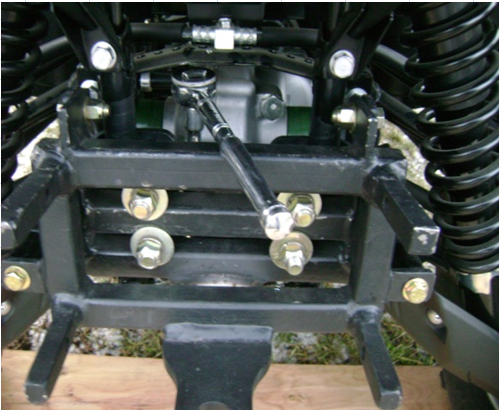
Use a long extension rachet to snug up the 2 factory bolts. Then snug up all the 4-1/2" X 3 1/2" bolts. Once all bolts are snugged up, tighten all bolts. Bolts should be checked periodically to ensure they are tight for safety when riding.
Step 6:
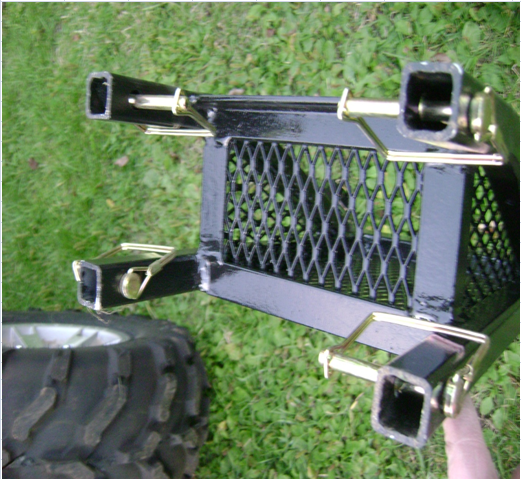
The Flip Guard Carrier Model or the Sport Model can be attached to the Assembly on the Grizzly ATV by removing the 4 quick pins, then sliding the the Flip Guard onto the four square bars of the Assembly and then reinserting the 4 quick pins and then locking into the closed position. Ensure that the locking arm of the quick pins do not hang down where the terrain could dislodge them out of the holes in the Flip Guard. Insert pins as in per picture. (Locking arms are kept to the inside of the Flip Guard.)
Step 7:
Follow these simple steps, and you'll have the Quad-Rite Flip Guard attached ready for the "ride of your life".
Maintenance:
Over time the quick pins can loosen off and not provide the function of a locking mechanism. The quick pins can be retightened by squeezing the locking arm tighly together.
Warning:
As mentioned in the Warnings, The Quad-Rite Flip Guard is positioned at a pre-determined angle and is not adjustable. This is set for your safety.
" Do Not Make Any Adjustments ".
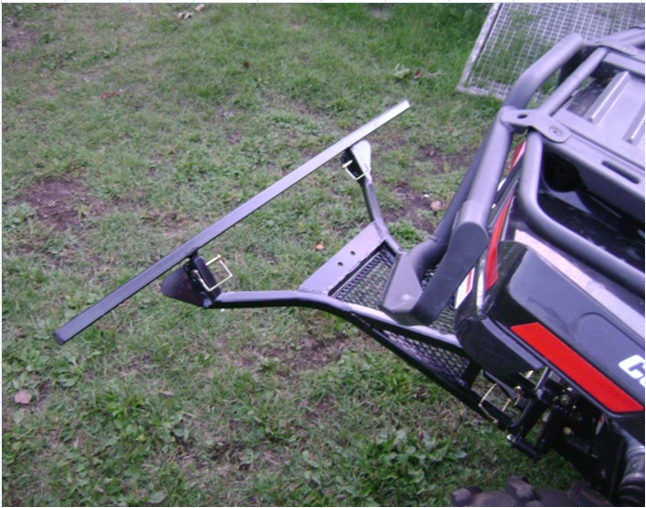
Loading Bar Option:
The Loading Bar is inserted into the back of the Flip Guard. Quick pins hold the Loading Bar in place. The Loading Bar is wider than the ATV which will give protection when climbing up the narrow ramps. Read the warning labels on the outside of the tips of the Loading Bar before use.
Detachable Hitch Plate Option:
The Detachable Hitch Plate can be attached and removed when required. Follow the warning label on the trailer hitch plate.
Top of Page